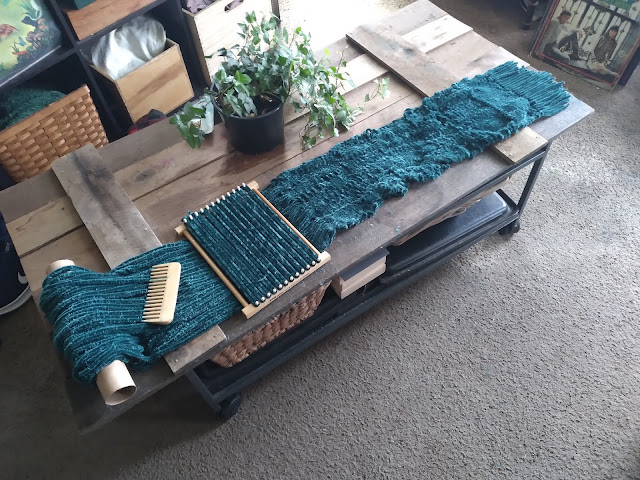
The art of loom weaving is an ancient practice of creating textiles that is very easy to do with a few simple supplies. For this project, all you need to make a scarf is a hand loom and yarn.
The loom in the example was part of a children's craft kit found at a yard sale years ago. You can find one at a craft store or make your own with a small wood frame and nails for pegs. A 7 to 9 inch loom is perfect for this project. To start, pick a good quality yarn...something plush and velvety in a dark color such as black, forest green, or raspberry red. Avoid cheap acrylic yarns at all cost, they will not look or feel right. We are aiming for an earthy, luxurious feel.
First cut a piece of yarn 200 inches long and begin to wrap around the pegs at the end of the loom, trying a knot at the top three times. Create a base of weft ( horizontal lines) to weave the warp into.
Next cut out 60 strands of yarn measuring 65 inches long. Begin to weave these warp strings into the loom base in the plain pattern. Alternate the "over and under" with each strand to create stability. Push the warp strings to the edge of the loom and keep them snug against each other with no gaps between. When you reach the bottom of the loom, loop the string over the bottom weft to secure it.
As you complete each square, carefully remove from the loom pegs and then create a new weft base with another 200 inch piece of yarn. Continue moving the warp strings into the new grid each time you finish a rectangular section.
It takes about 45 minutes to finish each rectangular section. Because this craft is so repetitive and simple, its the perfect project to do while watching movies or tv. I like to do one or two squares a night after work while watching vintage 60's Disney movies...
When you are finished, simply cut the end strands into any style you want and it's ready to wear!


No comments:
Post a Comment